Showing posts with label sweets. Show all posts

Tuesday, October 28, 2014

Homemade Twix Bars

Halloween is almost here! I love Halloween. I love making a costume and parading around in it for all to see,  but what I love most about Halloween, is fun sized candy bars. They're delicious and yet so dangerous. I've somehow managed to resist buying a box of candy and thus thankfully avoided the dreaded stomach ache after chowing down on forty bars of fun. This year I decided to make a homemade version of a favourite candy bar, Twix! These classic treats offer the buttery, cookie crunch of shortbread, topped with creamy caramel, all dipped in smooth, milky chocolate. You could make these into normal sized bars, but fun sized is obviously more exciting. Are you excited? You should be excited.


Ingredients
Adapted from Whisked and A Beautiful Mess

1/2 cup unsalted butter, room temperature
1/4 cup granulated sugar
1 1/4 cup all purpose flour
Pinch of fine sea salt

350g of soft caramels
1 1/2 tablespoons cream

1 bag of semi-sweet chocolate chips
1 1/2 tablespoon vegetable oil

Preheat the oven to 350 F and line a square 9x9 inch pan with parchment paper. In a large bowl, mix together the butter, sugar, flour and salt until crumbly. Evenly press the crumbly mixture into the bottom of the pan until firm. Prick slightly with a fork to avoid air bubbles and bake for 20 minutes, or until the edges are lightly browned.

While the cookie base is baking, melt the soft caramels and cream together in a sauce pan on medium-low heat. Stir occasionally to avoid burning. When the cookie is baked, allow to cool for 5 minutes and then pour the caramel on top. Spread it as evenly as possible and allow to sit until hardened. You may put it in the freezer to quicken the process.

When the caramel is set, remove the cookie from the pan and slice into bars of your desired length. Place the bars in the freezer. Melt together the semi sweet chocolate chips and vegetable oil, over 30 second intervals in the microwave. Remove the bars from the freezer and dip into the chocolate, ensuring they are fully coated. Allow the chocolate to set - again you may put in the freezer to speed up the process. Your last step is to overindulge and eat them all in one sitting.

Monday, January 13, 2014

Out & About: Bouchon Bakery


If you follow me on Instagram you may be aware that over the holiday season, I took a mini vacation with my family to New York City. I had only been there once before, in high school with the school band, so this time around I was excited to cross a few things off my list of must-do's in the Big Apple. New York City is an awesome place, everybody knows that, and there is so much to do, see, and eat that it's easy to cram your day full of things and yet miss so much at the same time. Most of what we did day-to-day revolved around bakeries, cafes and restaurants I wanted to eat in, which I'm sure by now is no surprise to you. One of the first on my list was Thomas Keller's Bouchon Bakery.


This bakery is a beautiful place. With open windows to the baking process in the back and an open display of the freshly baked goods - ranging from croissants to macarons to cookies and more - it's difficult to walk out empty handed. Having just had lunch at Hale & Hearty near the Rockefeller, we decided to finish with something sweet and caffeinated from the bakery I had heard so much about. Mom and I split the cranberry-orange and the egg nog macarons, while my dad and brother each had a TLC cookie - nobody was disappointed. The macarons were perfection, perfectly smooth and crisp on top, chewy inside, and not too sweet - oh how I hope to one day make macarons just like 'em. 

Happy to have crossed the bakery off my NYC list, a few days later on Christmas I was pleasantly surprised to open up the beautiful Bouchon Bakery cookbook. It is filled with gorgeous pictures and stories on how the bakery came to be, various baking techniques and suggestions, and of course drool-worthy recipes of items from the bakery itself! I tried out the carrot muffins (post to come) and they were delicious. This book is a great one to add to your cookbook collection, and the bakery is an even better place to stop off for a quick cup of coffee and sweet tooth satisfier. 

Note: None of these pictures are my own - mine were lost to an unfortunate phone+water incident. 
Source 1 / 2 / 3

Sunday, December 15, 2013

Homemade Marshmallows


Every year when Mom and I do our Christmas baking, I like to try and make something new, that isn't a typical cookie, is a bit of a challenge but if done successfully, guaranteed delicious. Last year I chose marshmallows. I love marshmallows. I love the marshmallow candies that are shaped like bananas and strawberries, I love s'mores, I love Rice Krispee treats - give me all the marshmallows! So this year for my friend Amanda's christmas party (which became more of a snowed in affair) I made gourmet marshmallows once again to be paired with a big mug of hot chocolate! I consulted both Martha Stewart and my new favourite book, Butter Baked Goods, and the results couldn't have been better. With a few "dipping" variations, I give you the recipe for homemade marshmallows:

Ingredients

3 packets of unflavoured gelatin
1 cup water
2 cups white, granulated sugar
1/2 cup corn syrup (I used golden)
1/2 teaspoon salt

In a mixing bowl, add 1/2 cup of the water and sprinkle the gelatin on top, allowing to stand for approximately 10 minutes. In a medium sauce pan on high, add the sugar, corn syrup, 1/2 cup of water and salt. Stir together and bring to a boil. Let it boil for one minute and then remove from heat. Stir together the gelatin and water a few times and then slowly add the sugar mixture, pouring it down the sides of the bowl with the electric mixer on low speed. Once it all has been added, put the mixer on high and mix for 12 minutes. Line a 9x9 baking pan with lightly greased plastic wrap, and prepare an additional piece to place on top. When you're done mixing, pour the marshmallow into the pan and spread evenly, placing your second square of greased plastic wrap on top. Let stand for 2 hours, or overnight.

When the marshmallow is firm, carefully remove by placing it upside down on a surface lightly dusted with icing sugar. With a sharp knife, cut the marshmallows into 1-inch squares. Depending on your tastes, you can either keep them plain and coat them with icing sugar, or you can coat some in toasted coconut. I also took some of the plain ones and dipped them in melted chocolate and either graham cracker crumbs (S'mores Mallow!) or candy cane pieces (Peppermint Mallow!). I can eat them just as they are or melt them away into a big cup of hot cocoa.


Monday, July 29, 2013

Chocolate Chip Cookies

                Chocolate chip cookies are one of those classic homemade goodies that I think just about everyone has a nostalgic love for. Though I don't remember when I first tried baking them myself, I do have many memories of flipping through my Mom's and Nana's recipe collection for cookie recipes, whipping up the recipe on the back of the chocolate chip bag with my mom, and slicing up those rolls of Pillsbury cookie dough at sleepovers (and eating a whole lot more dough than actual cookies). Though the dough rolls are pretty darn good sometimes it can be hard to find a recipe that never fails - a recipe that can be deemed "the best chocolate chip cookie recipe ever". In the mood to make cookies I was browsing through the Smitten Kitchen and found what she says is her favourite chocolate chip cookie recipe, so I obviously had to try it out for myself! With some minor adjustments I can definitely say that these cookies are a keeper. Crispy edges, soft inside and just the right amount of sweetness make these milk's perfect partner.

Ingredients 

1/2 cup white sugar
1/2 cup packed brown sugar
1 stick of cold, salted butter
1 egg
1 1/2 teaspoon vanilla extract
1/2 teaspoon baking soda
1 1/4 cup all purpose flour
3/4 cup semisweet chocolate chips
1/2 cup white chocolate chips

Preheat the oven to 300 F and line a baking sheet with parchment paper. Cream together the sugars and the butter. Beat in the egg, vanilla and baking soda until smooth. Whisk or sift the flour and then mix into the batter. Stir in the chocolate chips. Scoop small balls of dough onto the baking sheet (appx. 8-10 per run) and bake for 15 minutes or until lightly browned. Remove and allow to cool.

I made these bite-sized because I love just popping one in my mouth when my sweet tooth is around! I can't wait to make these again in the fall - sometimes theres nothing better on a cool day than a small snack of warm chocolate chip cookies, enjoy!

Monday, July 8, 2013

Peanut Butter Frosted Brownies

A couple weekends ago, we spent my friend Amanda's bachelorette weekend up at the cottage relaxing, laughing, and stuffing our faces. We managed to eat half a watermelon in less than a day, a whole lot of chips and of course some (necessary) baked goods. Amanda had mentioned on her own blog that she didn't think there were any recipes that could beat out the fudgey brownie box mixes - I accepted the challenge! I looked through my pins and favourite food blogs and decided on a recipe deemed "the best peanut butter brownies you'll ever have" on A Cup of Jo. She was not kidding. These brownies are dense, rich, fudgey, and of course chocolatey - everything you want in a brownie. All the girls loved them and we were sneaking slivers out of the fridge until they were gone (which didn't take very long). If you need something for a girls night, a family night, a games night or you just want some chocolate - make these, you will not be disappointed.


Chocolate Brownies

6 oz. semi-sweet baking chocolate
3/4 cup salted butter
1 1/2 cups white sugar
1/2 cup brown sugar
2 tbsp of brewed coffee, room temperature
2 tsp vanilla extract
3 eggs
1 cup white flour
1/2 cup semi-sweet chocolate chips


Preheat the oven to 350 F. Line a 9x9 square baking pan with aluminum foil and lightly spray with oil. Melt the butter and chocolate together in a small saucepan over a pot of boiling water, stirring continuously until smooth, then remove from heat. Whisk in the white and brown sugar. Mix in the coffee and vanilla. Beat in the eggs. Gradually add in the flour just until it is combined. Gently fold in the chocolate chips and pour the mixture into the pan. Bake for 20-25 minutes until a toothpick comes out (mostly) clean and let them cool.

Peanut Butter Buttercream

1/2 cup creamy peanut butter 
(not natural)
1/4 cup salted butter, softened
1 1/2 tsp vanilla extract
1 1/2 cups icing sugar
1/3 cup semi-sweet chocolate, chopped

Beat together the peanut butter and butter until combined. Add in the vanilla and icing sugar and beat until smooth. When the brownies have cooled frost and sprinkle with chocolate. Store in the refrigerator for 4 days.

If you haven't figured it out yet, these brownies definitely came out as victors in the boxed-brownie-mix challenge. They were a great post-dinner, pre-board games treat that made our bachelorette weekend extra special. These brownies are best straight from the fridge and washed down with the drink of your choice - either milk, or some red wine perhaps?

Monday, April 22, 2013

Coconut Raspberry Muffins

Feeling in the mood for coconut once again - but really who am I kidding? I'm always in the mood for coconut - I decided to make this muffin recipe for double coconut muffins that I had pinned on my Pinterest a little while back. The great thing about these muffins is that they had no butter, little sugar, and were also half whole wheat flour!

They didn't rise into your typical, crumby, muffin either but were more like a dense coconut biscuit, which I found to be even better. Though I loved the idea of 'double coconut' for taste I decided to mix in some frozen raspberries for some added flavour and colour. Great decision, they tasted amazing.


                            Ingredients 

3/4 cup all purpose flour
1/2 cup whole wheat flour
1 1/2 teaspoon baking powder
1/4 teaspoon salt
1/2 cup virgin coconut oil
1 cup plain greek yogurt
1/3 cup sugar
1 egg
1 teaspoon vanilla
3/4 cup sweetened shredded coconut
1 cup frozen raspberries

Preheat the oven to 375 F. Grease a muffin tin with coconut oil. Mix together the flours, baking powder, and salt. Stir in 1/2 cup of the shredded coconut. In a small saucepan, heat the coconut just until it melts then remove from heat. Beat together the coconut oil, yogurt, sugar, egg, and vanilla. Combine the flour and oil mixtures together. The batter will be very thick and heavy, similar to a cookie dough. Fold in the raspberries. Evenly distribute the batter into the muffin cups and sprinkle the tops with the remaining shredded coconut. Bake for 15-20 minutes or until a toothpick comes out clean.

I intended to have these for breakfast for a few days but they were so good I could barely stop myself, or my family, from snacking on them and finishing them within a day and a half! Such a simple, healthier, and delicious muffin recipe, this one is for the books!

Monday, April 15, 2013

Chocolate Brownie Cakes

The past couple weeks have been very chaotic and so a baking/blogging break was needed as I try and get into a rhythm of working two jobs, keeping up with hobbies and maintaining some form of a social life. I've also been trying to find recipes that aren't super indulgent but are a little on the healthier side. I saw this recipe for Whole Wheat Brownies on Martha Stewart's Pinterest boards a few weeks ago and decided to give it a go. Given that there is still a decent amount of butter and sugar in these, they are in no way a healthy snack. However, compared to the brownie recipes I've tried before, there are fewer eggs, and less butter and sugar overall - I will definitely use the reasoning "but they have whole wheat flour!" to deem them slightly nutritious. All this being said, they are not your typical dense, fudgey brownie, and lean a little towards the cakey side, while still give you that much needed chocolate fix!

Ingredients 

3/4 stick salted butter (6 tbsp)
1/2 cup white flour
1/2 cup whole wheat flour
1/3 cup cocoa powder
1 1/4 tsp baking powder
1/4 tsp baking soda
1 cup brown sugar
1 1/4 cup unsweetened applesauce
1 egg
8 ounces semisweet chocolate

Preheat your oven to 350 F. Grease a 9-inch square pan and line it with parchment paper. In a bowl mix together the flours, cocoa, baking powder, and baking soda. In a second bowl combine the sugar, applesauce and egg. Melt together 6 ounces of chocolate and the butter (either in the microwave or using a double-boiler). Combine the chocolate with the sugar mixture. Gradually add in the flour mixture. Pour into the pan and sprinkle the remaining 2 ounces of chocolate on top - I actually used some milk chocolate chips instead. Bake for 30-40 minutes until a toothpick comes out clean.

These are perfect with a glass of milk and could be made even better with some peanut butter chips or walnuts sprinkled in!

Monday, April 1, 2013

Food Loves: Cottage Desserts

This was the first Easter I've been home for in about two years, and I kind of forgot what my family traditions are. Of course I remembered my favourite Easter candies - Cadbury mini eggs and Whopper Robin Eggs - but when it came to our meals I wasn't sure what we ate. Together my family drove up to Muskoka for the weekend and enjoyed the coziness of the fire and quiet surroundings. We didn't have a big Good Friday meal planned because our Easter dinner was being held on Saturday evening. However both my father and brother asked about dessert - "There's no pie?", "Is there chocolate or ice cream or anything?", "I can't believe there's no pie!" So my mother and I looked at what we had and decided to whip up a simple apple crisp. I loosely followed this recipe but cut it in half, and left out the bourbon, vanilla bean, browned-butter and almonds because of the ingredients we had on hand. It was simple and delicious and a great match to our movie by the fire. 

Since we only made enough apple crisp for the one night, another dessert was needed for our big Easter dinner (I say big, but we really cut down this year - I'm not eating meat and there's always too much turkey leftover so I had veggie lasagna and the family had roast chicken). To fulfill our dessert needs it was off to our favourite Rosseau bakery for the best homemade pies money could buy - and I really mean that. If you're not into pie but are in the area, you should try their butter tarts, they're award winning! We chose a bumbleberry pie, topped it with homemade whipped cream and it couldn't be better. Happy Easter!

Monday, March 18, 2013

Out & About: Parisian Macarons

Pink Macaron with Vanilla Buttercream


At Christmas I like to try out at least one new recipe, and I usually try going against the average Christmas cookie recipes available. This past Christmas we took a shot at making those beautiful, little french cookies - macarons. After two tries we were moderately successful and very proud of our petite delights. They weren't perfect, but they still looked cute and tasted great. Since then we've been discussing how to make them just right, and looking through various recipes and books to figure out how we could perfect our macarons. So a couple months ago my mother and I decided to sign ourselves up for an afternoon class at Le Cordon Bleu. They have an extensive list of short courses available to the public and I was eager to try some out, but given the high price we had to narrow it down to just one. We chose "La Ronde des Macarons".

Chef Jocelyn preparing the cookie shells.


The class begins with a demonstration for both the cookie shells and fillings by two pastry chef instructors of France origins. They were both funny and knowledgable and taught us the exact process to making the perfect macarons - including the history, timing, and science behind them. I took as many notes as I could so that in the practical portion, I could replicate their creations.

Making the buttercream filling.


Next we're sent up to the kitchens and given ingredients, tools and uniforms to start the process. It was great to be able to ask questions to the chefs along the way to ensure we were doing things properly and that our cookies would turn out just right. I chose to make pink macarons with vanilla buttercream filling and Mom chose beige macarons with coffee buttercream filling. We were both very happy with the end result and now have a house swimming in macarons! It was the perfect afternoon for learning something new, having some fun, and eating something delicious.

This recipe is very simliar to the one we used however based on what I've learned, here are my suggestions:
- Heat the oven to 250 F
- Add a small pinch of cream of tartar to the eggs before beating, this helps them to form the soft peaks you're looking for
- During the deflating process (step 5), add the food colouring of your choice half way through
- Let the macarons rest for at least half an hour
- Do not open the oven before 10 minutes of baking have passed. At 10 minutes rotate the baking tray and bake for another 10 minutes for a total of 20 minutes baking time. 

Beige Macarons with Coffee Buttercream.

Saturday, March 9, 2013

Rocky Road Cookies


Since being out of school and on a job hunt, the past two months have allowed me to try my hand at new hobbies and put more effort into old ones. This blog has been a window into one of them - baking, cooking, eating (is that a hobby?) - and based on the feedback I've gotten from some Facebook pictures, a few people have noticed the increased amount of time I've spent on this hobby. I was talking to a friend the other day and he asked why I haven't been baking as much - a simple observation based on my lack of picture uploads. I assured him I have and promised to bake something in his honor this week. His only request that it be shark shaped. These cookies are clearly not shark shaped, not even really shark inspired. I originally had bought a few ingredients to try a new biscotti recipe - I was thinking it was similar to a shark shape and could justify it - but that recipe was a bust. They just didn't turn out nearly as well as I would have liked. After a quick search on Pinterest I decided to make rocky road cookies adapted from this recipe - such a yummy treat that definitely made up for my biscotti fail.

Ingredients

1/2 cup flour
1/4 cup cocoa powder
1/4 tsp baking soda
1/4 tsp salt
1/4 cup semi-sweet chocolate chips
1/2 stick unsalted butter
3/4 cup sugar
1 large egg
1/2 tsp vanilla
1/4 cup pecans, chopped
1/4 cup mini marshmallows
1/4 cup dark chocolate chips

Preheat the oven to 325 F. Mix together the flour, cocoa, baking soda and salt. Melt the semi-sweet chocolate chips with the butter (I did this for 30-45 seconds in the microwave). With an electric mixer on low speed, combine the melted chocolate, sugar, egg and vanilla. Gradually add in the flour mixture.  Using a rubber spatula mix in the pecans, marshmallows and dark chocolate chips. Bake for 10-15 minutes until the tops began to crack. Get a cup of tea or glass of milk and cozy on up with these chocolatey goodies!

Makes 1 dozen cookies.

Note: Be careful with the marshmallows, if they are near the sides or bottom of the cookies before baking, they can ooze out and become a burnt, sugary mess. Also, feel free to use other types of chocolate chips or nuts - maybe swapping them for broken up graham crackers (apparently I'm really into making things S'mores flavoured re: this post)!

Friday, March 1, 2013

Banana Nutella Granola

Going along with my granola kick of November, I went ahead and tried out a few kinds that we're probably less on the healthy-hippy-granola side and probably more on the I'm-calling-it-granola-even-though-it's-covered-in-chocolate side. Either way the recipe I followed for Banana Nutella Granola was delicious.

Ingredients

3 1/2 cups rolled oats
1/2 cup of ground flax (and/or chia seeds)
1 cup almonds, roughly sliced
1 tsp cinnamon
1 banana, mashed
1/4 cup Nutella
1/4 cup honey
1/4 tsp salt
3/4 cup banana chips

Preheat your oven to 350 F. Mix together the oats, flax, almonds and cinnamon. In a saucepan on medium-low heat, combine the banana, Nutella, honey and salt. Boil for one minute, remove from heat and combine with the oats until well coated. Evenly spread over a non-stick baking sheet and bake for 30-40 minutes, stirring occasionally for even baking. Once cooled store in an airtight container for at least 2 weeks - though mine lasted for much less, I really love snacking okay? Overall a delicious take on granola that was perfect atop a bowl of vanilla yogurt - or I imagine even on ice cream but I suppose that would take me even further away from the healthy-hippy side of things now wouldn't it. Happy snacking!

Friday, February 22, 2013

Chocolate Cupcakes with Toasted Coconut Frosting

Yesterday was my Mom's birthday (Happy Birthday Mom!). After just coming home from a last minute vacation, there wasn't much time to pick up a birthday gift. That being said I am all about anything homemade. It adds a personal touch that can't be store bought, and more often than not is much more delicious. So as my Mom was out for the morning, I did my best to make a tasty birthday treat with what was in our cupboards. I didn't have time to run out and pick up other ingredients if I wanted the treat to be complete and all cleaned up by the time she got home, so I browsed through various recipes that included chocolate and coconut. The result was combining a couple different ones to create chocolate cupcakes with a toasted coconut frosting. I followed this recipe for the chocolate cake,  however I divided it in half and split it into a dozen cupcakes - sometimes an entire cake can be a little overwhelming to eat.

Ingredients 

1/2 cup boiling water
1/4 cup cocoa powder
1/2 tsp vanilla
1/2 cup (1 stick) unsalted butter, softened 
1 cup sugar, heaping
2 eggs
1 1/2 cups all purpose flour
1 tsp baking powder
1 tsp baking soda
1/4 tsp salt

Preheat the oven to 350 F and line a muffin tin with 12 paper muffin cups. In a small bowl dissolve the cocoa powder in the boiling water, and add the vanilla when cooled. With an electric mixer, cream the butter and sugar. Add in the eggs one at a time until well combined. In a separate bowl combine the remaining dry ingredients. With your mixer on low, gradually add the cocoa mixture and flour mixture to the butter, eggs and sugar. Mix until everything is blended. Evenly distribute the cake mixture into the 12 muffin cups and bake for 12-15 minutes, or until a toothpick comes out clean. Allow the cupcakes to completely cool before icing.


For the frosting I used this recipe. It is more similar to marshmallow fluff than buttercream but I found it to be the perfect topping - not too sweet or heavy. Though next time to add more coconut flavour, I would substitute the vanilla extract with coconut. I toasted half a bag of sweetened, shredded coconut, and after icing the cupcakes, sprinkled it on and shook off any excess. The result couldn't have been better! After a nice dinner at home, these moist, chocolatey with just a hint of coconut cupcakes were a great alternative to any store-bought birthday cake.

If you're not a fan of coconut, try sprinkling graham cracker crumbs on top instead of coconut for a s'mores flavoured cupcake!

Friday, February 1, 2013

Vegan PB+J Thumbprint Cookies


Another cold and blustery day outside, what else is new? After a quick step outside to run some errands, I knew exactly what I wanted to do when I got home - bake. Warm cookies do wonders to warm up your belly, and an oven turned on makes your apartment nice and toasty too - a great bonus. After reading one of my favourite blogs I was inspired to try out their PB+J Thumbprint cookies, but feeling a little crazy today I decided to experiment a bit. I followed this recipe and swapped a few ingredients just to see how things would turn out. Lucky for me they turned out great and now I've got a yummy batch of cookies ready to be eaten!

Ingredients

1/2 cup oat flour (I just ground up some oats in a food processor)
1/3 cup brown sugar
1/4 tsp salt 
1/3 cup chopped pecans
1/2 cup natural peanut butter
1/2 banana, mashed
jam of your choice + a few chocolate chips


To start (after grinding up the oats) I mixed together the flour, sugar, salt and chopped pecans. Next I mixed in the peanut butter and banana until well combined. This took a little extra arm power to make sure it was all mixed, but if yours is too dry add in some more peanut butter, and a little more mashed banana (maybe not the whole other half though). Roll the dough into 12 balls and place on a cookie sheet. After lightly  pressing the tip of your thumb into each, top each cookie with either a little bit of jam or a few chocolate chips. Bake in the oven at 325 F for 10-12 minutes.

These bite sized cookies are a great "sweet tooth satisfier" without feeling too guilty. I love the hint of banana taste (though this could be replaced with an egg if you're not into banana) and the jam and chocolate treats on top make them extra special. They're perfect with a glass of milk or cup of tea and a warm blanket to cozy under!

Monday, January 28, 2013

Pumpkin Cranberry Almond Granola

For the month of November I was on a big granola kick. I found it to be the perfect start to my morning when added to some greek yogurt and fresh fruit, or the perfect pick-me-up snack in the late afternoon. After trying a few store-bought varieties, I decided that it was about time I made my own to ensure it had all the extras and added crunch I was looking for. I loosely followed this recipe for guidance.

Ingredients
2 1/2 tbsp extra virgin olive oil
dash of salt
3/4 tsp pumpkin pie spice
1/3 cup honey
1/3 cup pumpkin puree
2 cups rolled oats
1/2 cup chopped almonds
1/2 cup dried cranberries

Preheat your oven to 325 F (or a little lower as my oven tends to be a hot one).


In a large bowl add the olive oil, salt, pumpkin pie spice, honey and pumpkin puree and mix until well combined. Stir in the oats and almonds until coated. Evenly spread out mixture onto a nonstick pan (or one lined with parchment paper). Bake the granola for approximately 40 minutes, or until lightly browned, stirring occasionally to ensure even baking. Store in an airtight container and it should last you for at least a week - assuming you're able to control your munching!


Friday, January 18, 2013

Just A Few Cookies

If there is one thing I am for sure, it is a homebody. My idea of a perfect night is one where I'm cozied up in a blanket, watching a movie and munching a delicious baked good - even better if it's hot out of the oven. Simliar to my previous post, it's much nicer if I can make these treats one-person sized and so when my friend Amanda suggested this recipe, my nights were changed forever! Of all the baked goods out there, nothing beats a warm chocolate chip cookie, especially when paired with a cold glass of milk. This recipe was perfect.

Now, as usual I have my own little notes. This recipe claims to make two cookies however I found that it made three quite large ones. I can understand the difficulty in figuring out a recipe for just a couple cookies, however being a person that prefers them in bite sized form, I would say this recipe makes enough cookies to be shared with a friend or two. My cookies also didn't turn out at all like the picture in the recipe, and not to toot my own horn, but I think they turned out better! I did not do the requested instruction of "deflating" the cookie, I thought they looked perfect coming out of my (cooler at 325 F and longer timed at 10 minutes) oven and left them be. These cookies were exactly what I needed for my cozy night in.

Tuesday, January 15, 2013

Apple Raspberry Crisp


Being the middle of January, today is rather cold and grey. It is also the perfect weather for one-person-sized, warm and oaty desserts. One of my favourites is apple crisp. The smell of apple crisp fills the room with the coziest of scents, and the taste makes your insides feel like they're cuddled up in a warm blanket - which you may in fact be. Feeling inspired by this recipe, but also feeling a lot less vegan and gluten free, I decided to make my own personal sized apple raspberry crisp to help myself warm up from a cold day.


                             Ingredients

               1 apple (I used granny smith)
                         6-8 raspberries
                            2 tsp water
                            1 tsp honey
                      squirt of lemon juice
                          1/4 tsp vanilla
                          2-3 tbsp butter
                           1/4 cup oats
                    1-2 tbsp brown sugar
                    sprinkle of cinnamon

Preheat the oven to 350 F. In a small bowl mix together the water, honey, lemon juice and vanilla. Peel and chop the apple into chunks, and with the raspberries, stir in the honey mixture until the fruit is well coated but not mushed. Pour the fruit into a small ramekin. In a second bowl, combine the butter, oats, brown sugar and cinnamon (the amounts of some of these ingredients depends on how crumbly you like your topping). Sprinkle the crumbly topping on top of the fruit evenly and pop into the oven for 20-30 minutes, until the fruit juices are just bubbling around the outside. I paired it with some greek yogurt on top but it would also taste great with ice cream or whipped cream (but I don't think I need to tell you that)! And of course this recipe can be doubled, tripled or quadrupled if there is more than one of you!

Tuesday, January 1, 2013

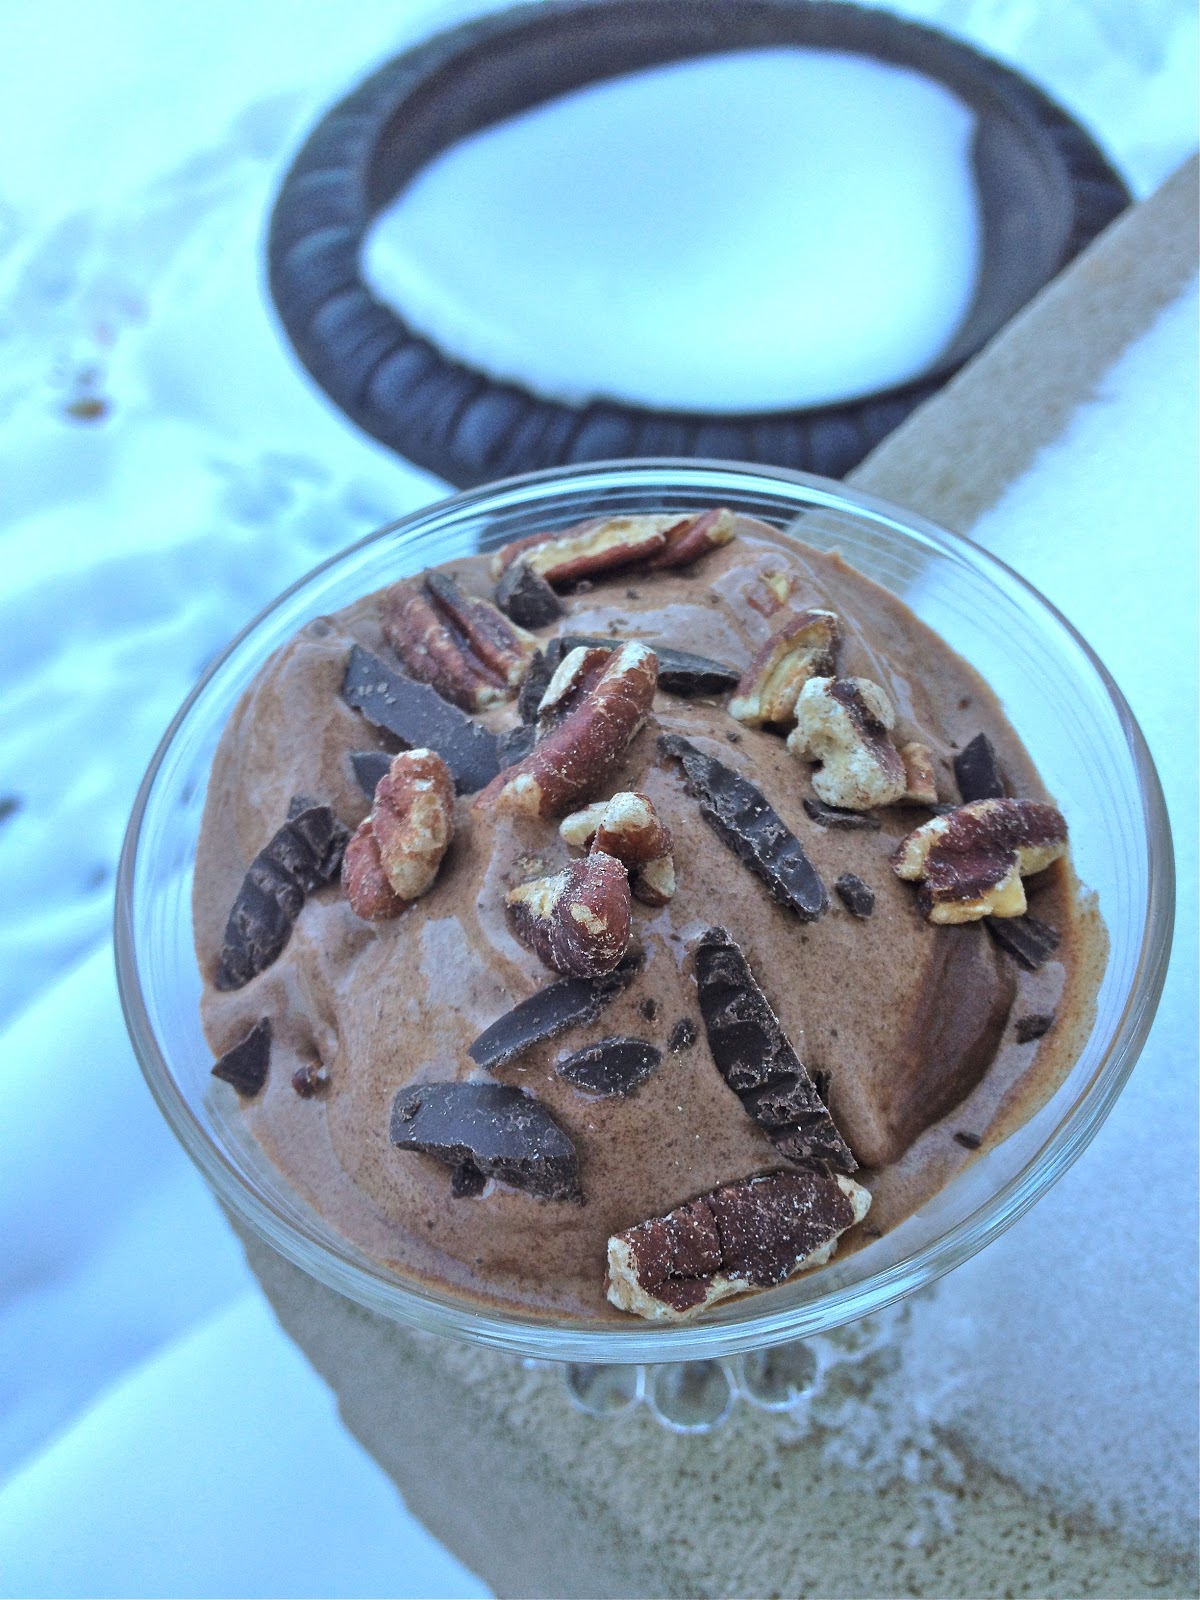
Dark Chocolate Toasted Pecan Ice Cream


It may be negative degrees Celsius outside, but what better way to celebrate the new year than with some homemade ice cream. Having been gifted an ice cream maker for Christmas I was very excited to test it out and see what kind of creamy concoctions I could come up with. For my first ice cream making endeavour, I followed this recipe for dark chocolate ice cream, and decided to make it a little more my own by adding in some toasted pecans.


To toast the pecans, simply heat your oven to 350, line a baking sheet with parchment paper, spread out the chopped pecans and pop into the oven for no more than five minutes.

The ice cream batter alone was delicious but after a good 25 minutes of churning (adding in the pecans in the last couple minutes) it was even better. Thick, creamy, and not too rich - it's going to take everything in me not to finish it this afternoon. The recipe made about the equivalent amount of ice cream as what comes in a Ben & Jerry's container. Scoop it out into some pretty dishes, top with left over pecans and some shaved dark chocolate and you've got yourself a happy new year!